跳到主要內容

[DevOps] 實作軟體CI/CD運行架構 - ASP.NET Core test unit 單元測試

ASP.NET Core的單元測試(Test Unit)建置方式參考:

MSTest :

建置出的UnitTest.cs class中可以建立多個[TestMethod],若以ASP.NET Core的project來看,就是在UnitTest.cs中針對要測試的controller進行測試,new一個欲測試的controller instance,叫用要測試的controller function,傳入測試的參數即可。

Controller function回應的result可用原有的Assert判斷是否符合預期結果,或是第三方的FluentAssertions

FluentAssertions :

執行測試 : [測試] -> [執行] -> [所有測試]


將資訊存入log file

透過Nuget安裝NLog.Config和NLog.Web.AspNetCore:

安裝後可看到project多了一個NLog.config檔案:

打開NLog.config,依序在Targets及Rules區塊新增以下設定

Targets

<target name="logfile" xsi:type="File" fileName="C:\temp\log\${shortdate}\debug.log"
        layout="${date}| ${level} | ${message}"/>
<target name="fatalfile" xsi:type="File" fileName="C:\temp\log\${shortdate}\fatal.log"
        layout="${date}| ${level} | ${message}"/>
 

Rules(Routing條件)

<logger name="*" levels="Trace,Debug,Info,Warn,Error" writeTo="logfile" />
<logger name="*" level="Fatal" writeTo="fatalfile" />


之後只要在測試code裡透過如下方式即可將文字存成log file:

logger.Trace($".................");
logger.Debug($".................");
logger.Info($".................");
logger.Warn($".................");
logger.Error($".................");
logger.Fatal($".................");

透過Jenkins設定自動進行Unit test:

安裝MSTest和VSTest plugin,可以選擇用其中一個進行Jenkins的單元測試,但是實測發現VS 2017建立的MSTest單元測試project無法透過Command line的方式進行單元測試,因為VS 2017建立的MSTest單元測試是使用MSTestV2,而Visual studio自帶的MSTest.exe是V1的版本,運行時會發生"沒有可執行的測試"的錯誤。

因此在Jenkins上改以VSTest 進行單元測試,以下為安裝過程:

安裝MSTest、MSTest Runner、VSTest Runner

CI JOB增加單元測試(Unit Test)的步驟前,我們得先安裝和組態幾個Plugin。

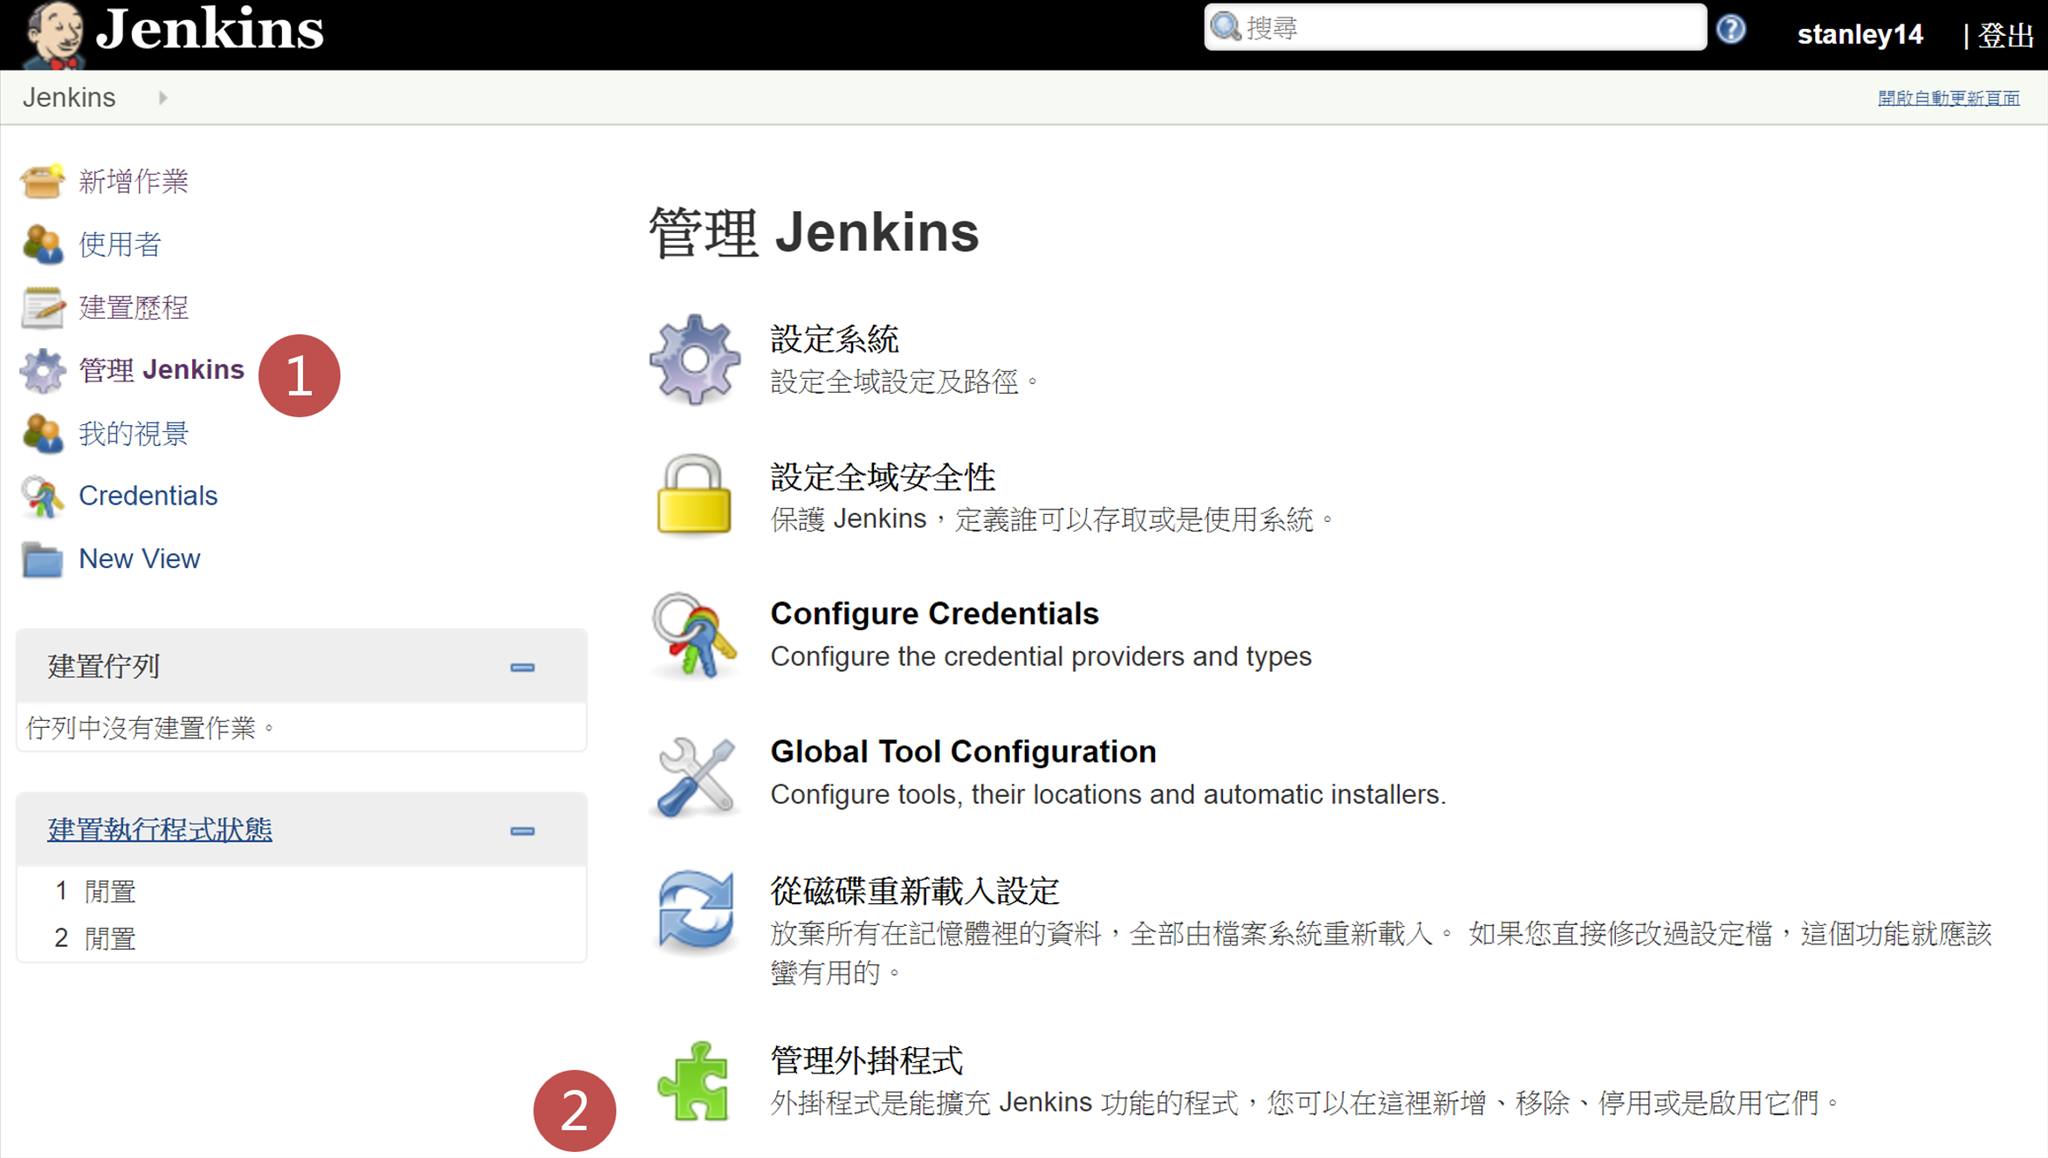
1.進入JenKins網站,管理 Jenkins > 管理外掛程式

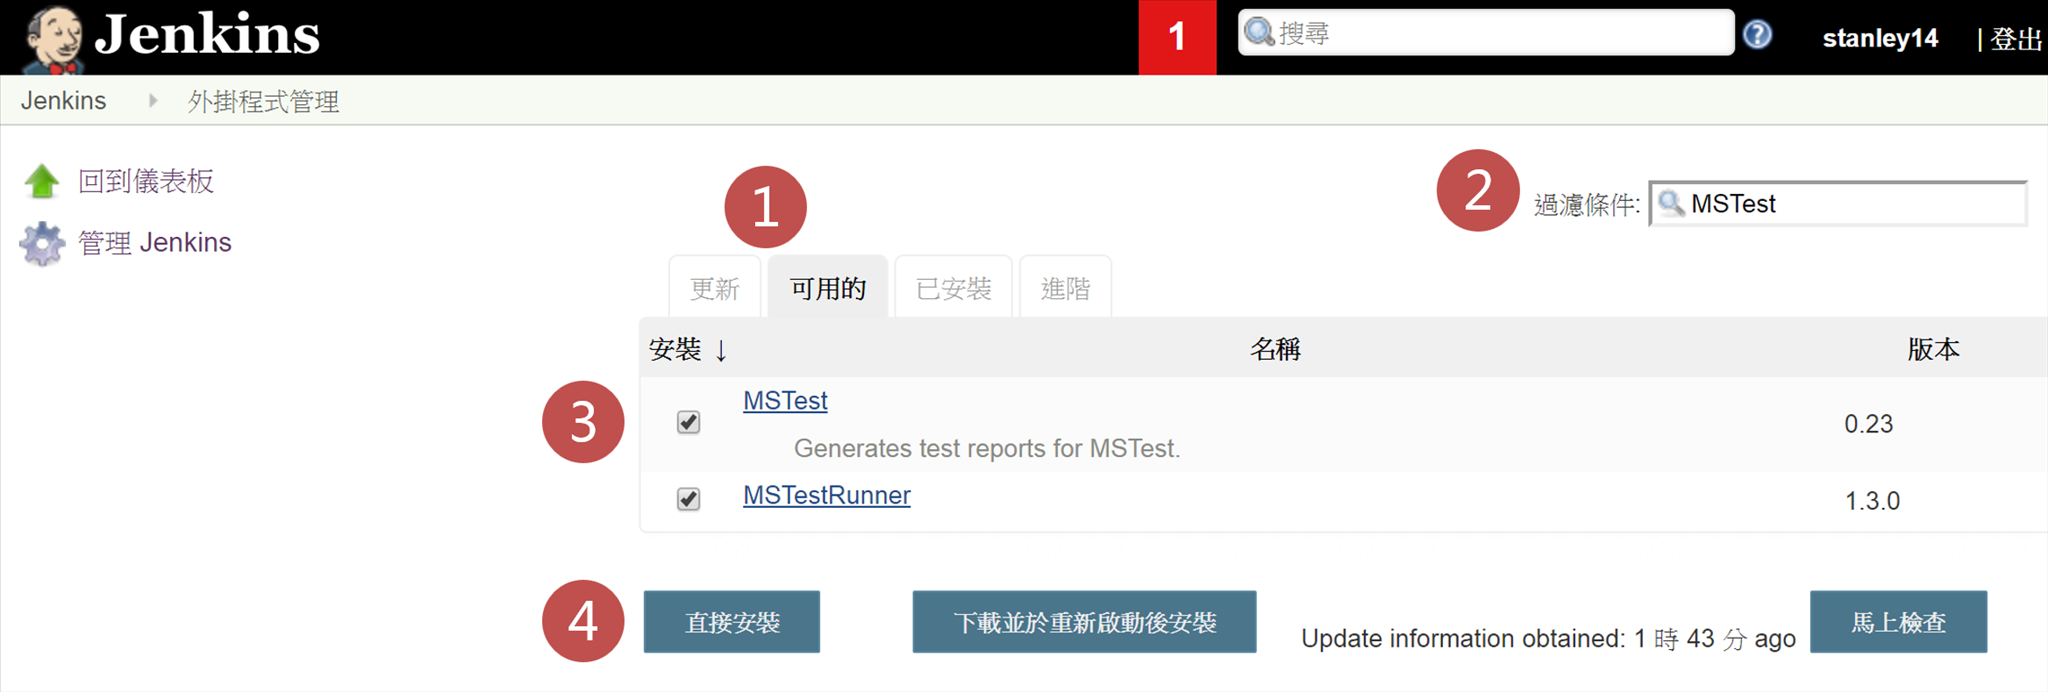
 2.過濾條件輸入MSTest,勾選MSTest及MSTestRunner 兩個plugin安裝,最後按下直接安裝按鈕。

 3.過濾條件輸入VSTest,勾選VSTestRunner plugin安裝,最後按下直接安裝按鈕。


組態MSTest Runner /VSTest Runner Plugin

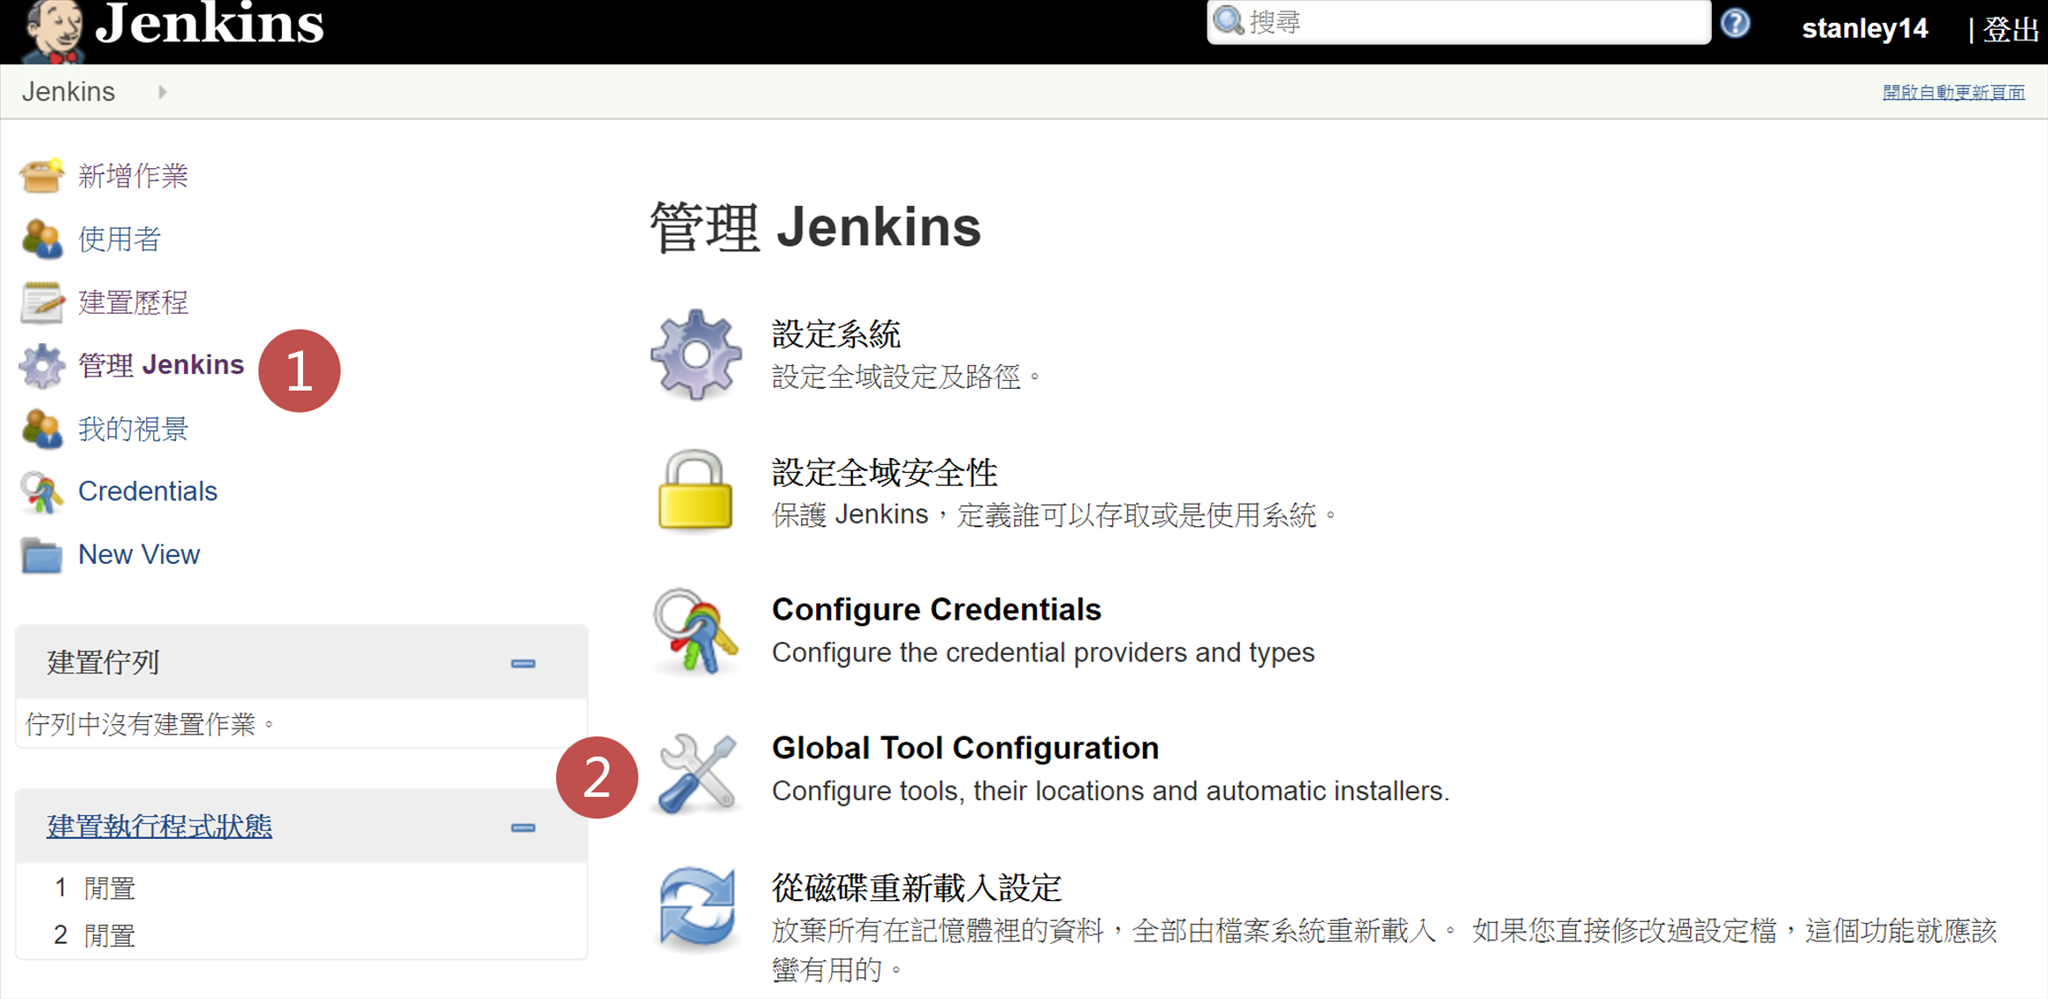
1.管理 Jenkins > Global Tool Configuration

 2.找到下方的MSTest區塊,按一下新增MSTest按鈕


3.依序設定測試框架名稱及測試執行檔位置

  • MSTest 15
  • Path to MSTest(不能只輸入目錄,一定要輸入完整執行檔案的名稱) C:\Program Files (x86)\Microsoft Visual Studio\2017\Enterprise\Common7\IDE\MSTest.exe

 4.新增VSTest,依序設定名稱及執行檔目錄(路徑前後要用雙引號包起來)

Name: VSTest 15

Path: "C:\Program Files (x86)\Microsoft Visual Studio\2017\Enterprise\Common7\IDE\Extensions\TestPlatform\vstest.console.exe"

5.最後按下儲存按鈕。


組態CI JOB加入MSTest Runner或是VSTest Runner(擇一)

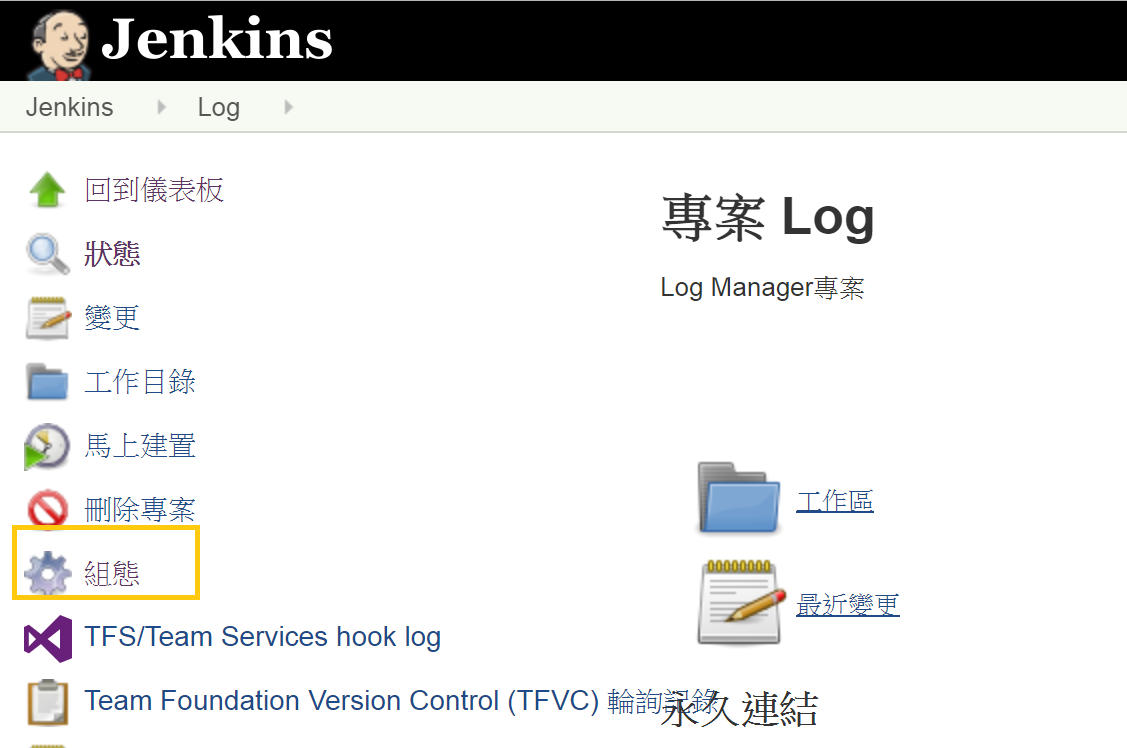
1.在專案頁面,按一下組態選項。
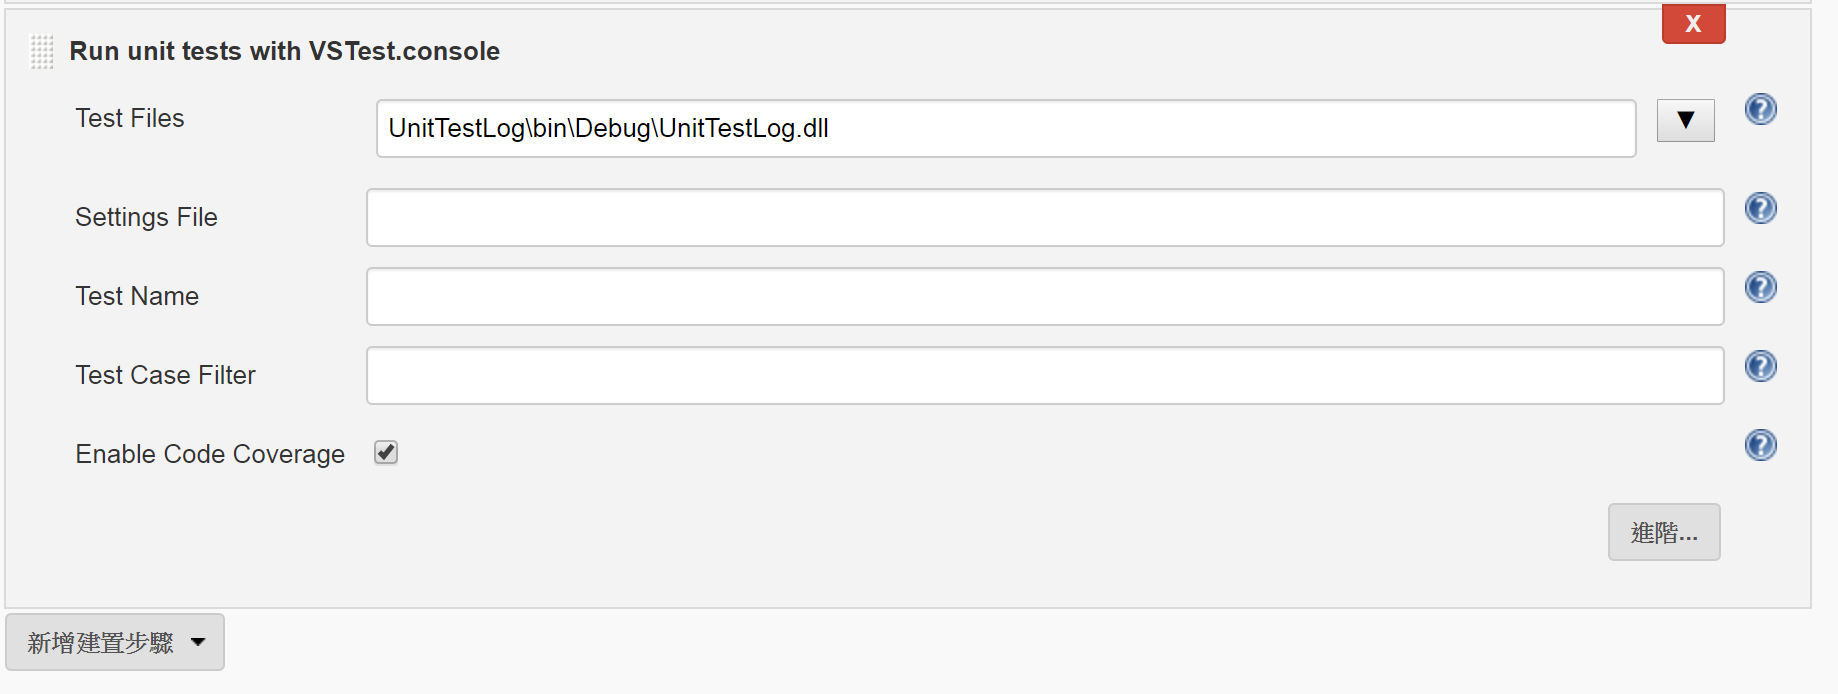
 2.在建置階段中,新增一個建置步驟-Run Unit Tests With VSTest.console

設定單元測試的.dll:
4.在建置後階段,新增一個建置後動作Publish MSTest test result report,最後按下儲存按鈕。
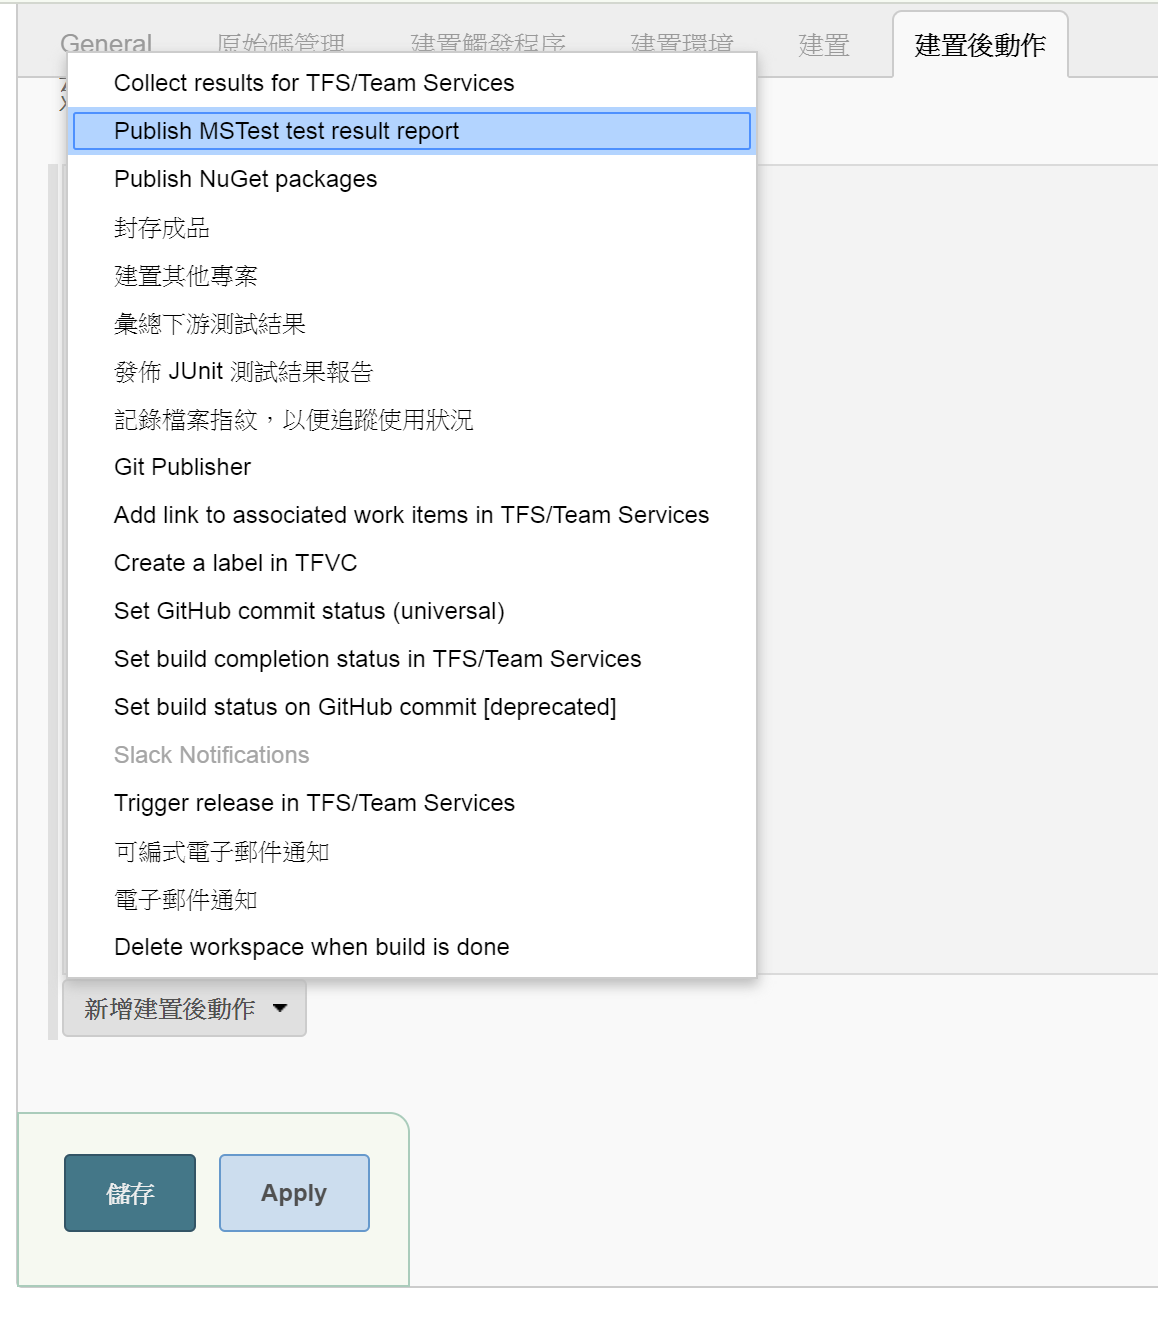
 5.預設要抓測試結果檔的路徑就是**/*.trx

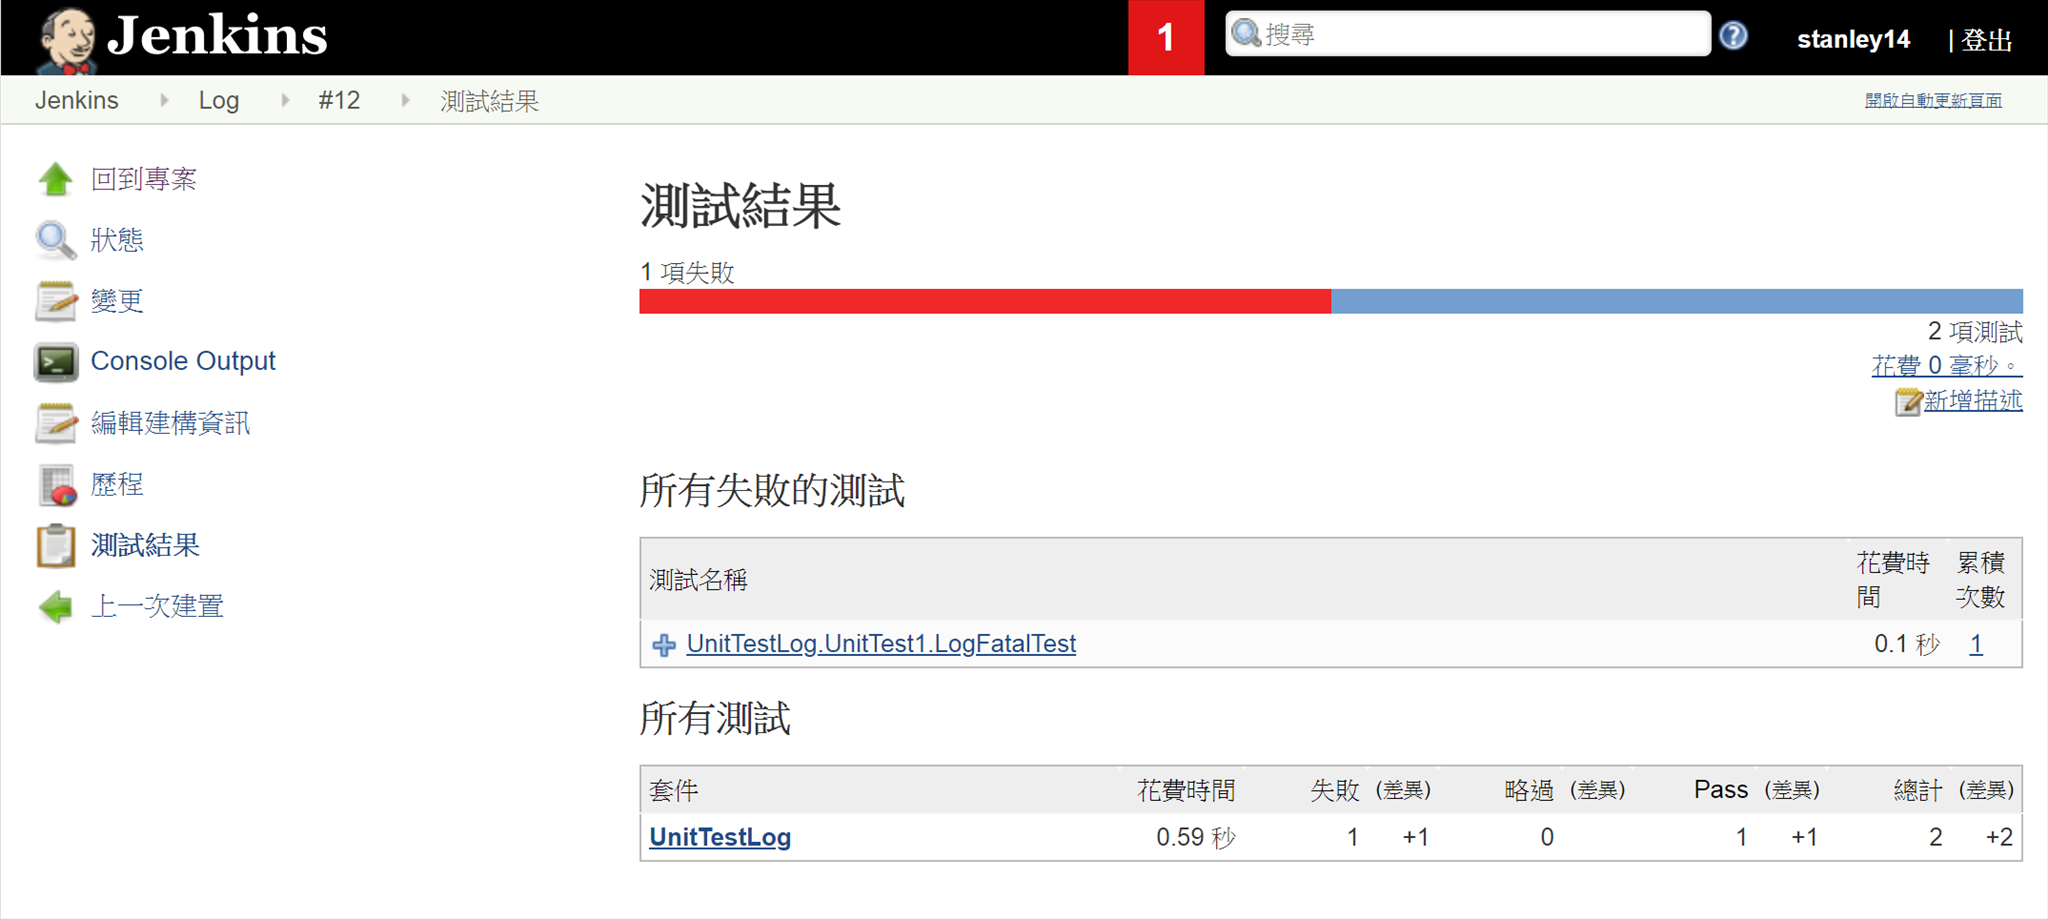
 6.馬上執行建置!就可以收到測試結果。

PS. 此處請注意Visual Studio自帶的MSBuild.exe有多個,for不同的平台。所以MSBuild的路徑要設對,請確認是C:\Program Files (x86)\Microsoft Visual Studio\2017\Enterprise\MSBuild\15.0\Bin\MSBuild.exe

不要設到 x64路徑下的MSBuild.exe了,否則執行測試時可能會發生找不到testhost.dll的錯誤喔!!

留言

這個網誌中的熱門文章

[Python] 管理多個執行緒(thread)的運作與結束

在開發應用程式中,幾乎所有的專案都會用到thread,不同的程式語言有不同˙的叫用方法,但都大同小異。Thread的使用上最重要的不是在產生一個thread,而是如何結束一個thread,或是如何結束好幾個threads,以下介紹在Python中如何叫用並管理一或多個thread: 一般來說,create thread如下: def job(): while 1: print("Child thread:", i) time.sleep(1) #In main code thread = threading.Thread.__init__(job) thread.start() 這樣可以開始一個thread執行job()中的動作,但若job中的迴圈是如上範例的無限迴圈,必須要加上能讓其退出的機制: stopped = 0 def job(): global stopped while stopped == 0: print("Child thread:", i) time.sleep(1) #In main code thread = threading.Thread.__init__(job) thread.start() 這樣在主程序先將stopped設成1,再調用 thread.join() 就可以將thread完整關閉並釋放記憶體空間。 多執行續的處理: 基於這樣的方式,下面是進化版本,創建一個thread專用的class,並同時處理多個thread的執行與結束: class EventHandleThread (threading.Thread): def __init__(self, fun, name): threading.Thread.__init__(self) self.name = name self.fun = fun self.stopped = [0] def run(self): self.fun(self.name, self.stopped) print ("Exiting " ...

[Python] 將程式設定為全螢幕顯示(full screen)和永遠在最前景、最上層(topmost)

這裡以創建一個tkinter 的 Application物件為例 EX: app = Application() app.master.title("WaferCheckApp") app.master.geometry("1100x720") 將UI顯示在最上層: app.master.attributes('-topmost', True) 將UI以全螢幕顯示: app.master.attributes('-fullscreen', True)

[Python] 自己製作文字設定檔config file,動態調整程式設定

在軟體開發中,通常不會知道實際使用行為有那些與原先預期不一樣的情況,這時如果還要針對特定的不同需求改程式是很吃力不討好的事情。所以我們常常會需要能夠動態調整一些設定,以應付不同的使用情況。 下面以Python提一個簡單的方法來動態調整程式設定: 建立一個function,在程式初始化時呼叫: EX: def initialSetting():         try:             currentDirectory = os.getcwd()             filePath = '%s\\ ToolSet.cfg ' % (currentDirectory)             file = open(filePath, 'r')             for line in file.readlines():                 if line.find("Value1") == 0:                     str1 = int(line[7:-1])                 elif line.find(" Value2 ") == 0:                      str2  = int(line[7:-1])                 elif line.find(" Value3 ")...